Most vacuum cleaner problems come from a blocked airway, a full bag or bin, a dirty filter, a worn belt, or a loose connection. In many U.S. homes, you can fix these issues with basic tools and a few careful checks. Always unplug a corded vacuum before opening it, and do not work on a battery pack unless the manufacturer permits it.
This guide covers upright, canister, stick, and handheld vacuum cleaner repair. It explains what to check first, which repairs are reasonable to do at home, how much professional service may cost, and when replacement makes more sense.
Start With Safety and the Right Tools
Vacuum cleaners use household electricity, moving parts, heat, and strong suction. Safe repair starts with removing power and keeping dust away from your eyes and lungs.
Before you begin:
- Unplug the vacuum from the wall.
- Turn off and remove the battery from a cordless model, if possible.
- Let the motor cool for at least 30 minutes.
- Work on a clear, dry surface.
- Wear safety glasses when cleaning packed dust or debris.
- Use a dust mask if the vacuum contains fine dust, mold, pet dander, or unknown material.
- Keep children and pets away from loose parts.
- Take photos before removing wires, covers, or belts.
Useful tools may include:
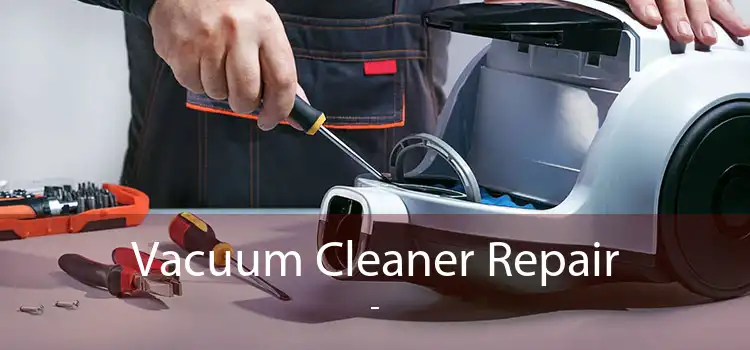
- A Phillips and flat-head screwdriver
- A small brush
- Needle-nose pliers
- Scissors or a seam ripper
- A flashlight
- A clean cloth
- A replacement belt, filter, bag, or fuse made for the exact model
Do not bypass a fuse, thermal protector, safety switch, or damaged power cord. The U.S. Consumer Product Safety Commission advises consumers to stop using electrical products with damaged cords, overheating, smoke, or burning odors. A vacuum with these signs needs professional evaluation or replacement.
Check the model before buying parts
Find the model number on the rating label, usually located under the vacuum, behind the dust bin, near the brush roll, or on the rear housing. Brand names alone are not enough. Belts, filters, batteries, and brush rolls often vary by model.
Use the owner’s manual or the manufacturer’s parts page to confirm:
- The correct filter type
- Belt size and shape
- Brush-roll design
- Battery model
- Fuse rating, if the model uses a replaceable fuse
- Whether the filter can be washed

Diagnose the Symptom Before Opening the Vacuum
The fastest repair begins with the symptom. A vacuum that will not start needs a different check from one that runs but has weak suction.
| Symptom | Common causes | First checks |
|---|---|---|
| Will not turn on | Outlet, plug, switch, cord, battery, thermal protector | Test the outlet, inspect the cord, let the motor cool |
| Runs, but has weak suction | Full bag or bin, blocked hose, dirty filter, air leak | Empty the bin, clean filters, check the hose |
| Brush roll will not spin | Hair, jam, broken belt, faulty switch | Remove debris and inspect the belt |
| Vacuum shuts off during use | Overheating, clog, dirty filter, failing battery | Clear airflow paths and allow cooling |
| Loud rattling or grinding | Debris, worn bearing, damaged fan, loose part | Stop use and inspect the brush roll |
| Burning smell | Slipping belt, jammed brush, electrical fault, overheated motor | Unplug it at once |
| Dust blows back out | Missing filter, damaged seal, full bin, wrong filter | Refit or replace the filter |
| Cord will not retract | Tangled cord, damaged reel, broken spring | Do not force the reel; inspect for damage |
| Water was picked up | Liquid reached an electrical part | Unplug immediately and seek service |
A useful diagnostic order
Follow the least risky and most likely checks first:
- Confirm that the outlet works.
- Inspect the plug and power cord.
- Empty the bag or dust bin.
- Remove visible blockages.
- Clean or replace the filters.
- Check the brush roll and belt.
- Look for overheating or unusual smells.
- Test the vacuum for a short time.
- Stop if the fault continues or electrical damage appears.
This order prevents a common mistake: replacing a motor when a clogged filter caused the shutdown.

How to Fix Common Vacuum Cleaner Problems
1. The vacuum will not turn on
First, test the wall outlet with another device. If the outlet works, inspect the vacuum’s plug and cord for cuts, crushed areas, exposed wire, melted plastic, or loose prongs.
If the vacuum stopped after heavy use, let it cool fully. Many models have a thermal protector that cuts power when the motor gets too hot. A blockage or dirty filter can trigger this protection.
If the vacuum still does not start:
- Check whether the power switch feels loose or stuck.
- Make sure the dust bin, cover, or bag door is seated correctly.
- Confirm that a cordless battery is charged and locked in place.
- Inspect the charging base and contacts on a cordless model.
- Do not open the motor housing unless you understand electrical repair.
A damaged cord, failed switch, blown internal fuse, or bad motor usually requires a trained repair technician. Cord replacement can expose you to shock if the wiring is not connected correctly.
2. The vacuum has weak suction
Weak suction usually means air cannot move freely from the floor head to the exhaust. Turn off and unplug the machine, then check the full path:
- Empty the dust bin or replace the bag.
- Remove the hose and look through it with a flashlight.
- Check the wand, floor head, and intake opening.
- Clean or replace the pre-motor filter.
- Clean the exhaust filter if the manual permits it.
- Check hose seals for splits or loose connections.
- Reassemble every part firmly.
Do not wash a filter unless the manual says it is washable. A wet filter can restrict airflow and may damage the motor. Let washable filters dry completely, often for at least 24 hours, before reinstalling them.
A simple test helps locate the blockage. With the hose removed, briefly check suction at the hose inlet. If suction is strong there but weak at the floor head, the clog is farther down the air path.
3. The brush roll will not spin
A powered brush roll can stop when hair, thread, rug fibers, or string wraps around it. Remove the brush roll if the manual allows it, then cut away the debris. Pull the material out rather than forcing the roll.
Inspect the belt. A damaged belt may look:
- Cracked
- Stretched
- Frayed
- Shiny from slipping
- Broken or missing
Replace it with the model-specific part. A belt that is too loose will slip. One that is too tight can strain the motor or brush-roll bearings.
Some vacuums stop the brush roll when the handle is upright, when the floor setting is wrong, or when a jam protection feature activates. Check the controls before assuming the belt has failed.
4. The vacuum smells like burning rubber
A burning rubber odor often comes from a belt that is slipping against a blocked brush roll. Unplug the vacuum and inspect the brush roll for hair or a jam. Spin the roll by hand only after power is removed.
An electrical or plastic-burning smell is more serious. Stop using the vacuum if you notice:
- Smoke
- Melted plastic
- A hot plug or outlet
- Sparks
- A sharp electrical odor
- Repeated shutdowns
Do not keep testing the vacuum to “see if it clears.” Continued use can worsen motor or wiring damage.
5. The vacuum is noisy
A new rattle may come from a coin, screw, pebble, or other object in the brush head or hose. Remove the hose and inspect the floor head.
A high-pitched squeal can indicate a slipping belt or a dry or worn bearing. Grinding may point to a damaged brush-roll bearing, fan, or motor bearing. If the noise remains after removing debris, professional service is usually safer than opening the motor.
6. The vacuum blows dust into the room
Stop using the vacuum until you find the cause. Check that:
- The bag or bin is installed correctly.
- The filter is present and seated.
- The filter is not torn.
- The dust bin lid and seals close fully.
- The exhaust filter is not missing.
- The replacement filter matches the model.
- The bin is not overfilled.
A vacuum that releases fine dust can reduce indoor air quality, especially for people with asthma or allergies. A high-efficiency filter may help only when the vacuum is designed to seal around that filter. Do not assume that any filter labeled “HEPA” will fit or perform correctly in every machine.
Replacing a Vacuum Belt, Filter, or Brush Roll
Small parts are among the most practical vacuum repairs. The exact process varies, so use the manufacturer’s manual for screw locations and disassembly limits.
Replace a belt
- Unplug the vacuum.
- Turn it over and remove the brush-head cover.
- Lift out the brush roll.
- Remove the old belt.
- Fit the new belt around the motor shaft and brush roll.
- Reinstall the brush roll and confirm that it spins freely.
- Replace the cover and test the vacuum briefly.
The belt may feel tight during installation. That is normal for many models, but it should not prevent the brush roll from turning by hand.
Replace or clean a filter
- Remove the filter according to the manual.
- Tap loose dust into a trash bag outdoors if practical.
- Wash it only if the manufacturer labels it washable.
- Let it dry fully before reinstalling it.
- Replace a filter that is torn, misshapen, permanently clogged, or past its service life.
Do not run the vacuum without the filters that the design requires. Dust can reach the motor and return to the room.
Replace a brush roll
A brush roll may need replacement when the bristles are worn down, the end caps are damaged, or the roll does not spin smoothly after cleaning.
After installation, check that:
- The brush roll sits level.
- End caps are in the correct position.
- The belt is aligned.
- No wires are trapped under the cover.
- The roll spins without scraping.

Cordless Vacuum Repair and Battery Problems
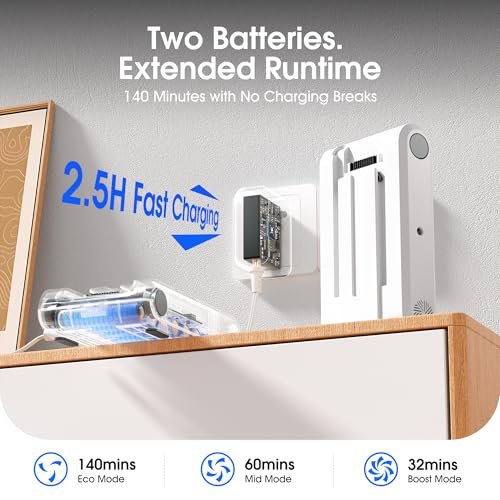
Cordless vacuums add battery, charger, and electronic controls to the repair process. A vacuum that will not charge may have a dirty contact, failed charger, worn battery, or control-board fault.
Try these checks:
- Confirm that the charger is made for the exact model.
- Inspect the charger cable and plug.
- Clean charging contacts with a dry cloth.
- Make sure the battery clicks fully into place.
- Let the vacuum cool before charging.
- Check for error lights described in the manual.
- Test a second compatible charging method only if the manufacturer supports it.
Do not open, puncture, crush, short, or rebuild a lithium-ion battery pack at home. A damaged battery can heat up, vent, or catch fire. Stop using it if it is swollen, cracked, unusually hot, leaking, or giving off an odor.
Recycle damaged or unwanted rechargeable batteries through a local household hazardous-waste program or a battery recycling service. Do not place a loose lithium-ion battery in household trash or a curbside recycling bin unless your local program specifically permits it.
When a battery is worth replacing
A battery replacement may make sense when:
- The vacuum is otherwise in good condition.
- Replacement batteries are available from the manufacturer or a trusted parts source.
- The machine has no motor, hose, or brush-head fault.
- The replacement cost is clearly below a comparable new vacuum.
If the battery is sealed into the body, replacement may require a service center. Opening the pack can void the warranty and create a serious safety risk.

Professional Vacuum Repair: Cost and When to Use It
A professional repair may be worthwhile for a high-quality vacuum, a newer machine, or a model with an expensive battery or sealed motor system. It may not make financial sense for a low-cost vacuum with several worn parts.
Typical U.S. repair prices vary by city, brand, part, and shop. A basic diagnosis or cleaning may cost less than a motor, battery, or control-board replacement. Ask for a written estimate before approving work.
Compare:
- Diagnostic or bench fee
- Labor charge
- Replacement part cost
- Shipping or special-order fees
- Warranty on the repair
- Remaining manufacturer warranty
- Cost of a similar new vacuum
- Availability of bags, filters, belts, and batteries
A simple decision rule is useful:
Repair is more attractive when the vacuum has a strong motor, available parts, and a repair estimate well below the cost of a comparable replacement.
Replacement is often more practical when the vacuum has several faults, a damaged cord and motor, a swollen battery, unavailable parts, or a repair estimate close to the purchase price.
Protect the warranty
Before opening a newer vacuum, check the warranty terms. Some repairs, such as cleaning a filter or removing a brush-roll jam, are normal owner maintenance. Motor, battery, wiring, or circuit-board work may need an authorized service provider.
Keep the receipt, model number, serial number, and repair records. These details can help with warranty claims and parts searches.

Common Vacuum Repair Mistakes to Avoid
Avoid these shortcuts:
- Running the vacuum with a wet filter
- Using a belt from a different model
- Installing a filter that does not seal
- Forcing a jammed brush roll
- Pulling hard on the power cord
- Testing a vacuum with exposed wiring
- Bypassing a thermal switch or fuse
- Using compressed air indoors to scatter fine dust
- Opening a lithium-ion battery pack
- Continuing to use a vacuum that sparks or smells electrical
- Reassembling parts without checking hose seals
- Throwing rechargeable batteries into household trash
A repair is successful only when the vacuum operates safely, maintains airflow, and does not overheat or release dust. A machine that “turns on” but still smells hot or loses suction is not fully repaired.

Vacuum Cleaner Maintenance That Prevents Repairs
Basic care can reduce clogs, overheating, and brush damage.
- Empty the bin before it reaches the fill line.
- Replace disposable bags when full.
- Clean washable filters on the schedule in the manual.
- Replace non-washable filters as directed.
- Remove hair from the brush roll often.
- Keep long strings and cords away from powered brush heads.
- Check the hose for cracks and blockages.
- Do not vacuum liquids unless the machine is designed for wet pickup.
- Store the vacuum in a dry place.
- Avoid pulling the vacuum by its electrical cord.
- Let the motor cool if the machine shuts off during use.
Homes with pets, long hair, fine dust, or construction debris may need more frequent filter and brush cleaning. The right schedule depends on use, not just the calendar.

Frequently Asked Questions
Is it worth repairing a vacuum cleaner?
It can be worth repairing when the problem is a belt, clog, filter, hose, or brush roll. Professional motor, battery, and control-board repairs need a cost comparison. If several major parts have failed, replacement may be more sensible.
Why does my vacuum lose suction after a few minutes?
A clog, full bin, dirty filter, or overheating motor is often responsible. Unplug the vacuum, clear the air path, clean the filters, and allow the motor to cool. If the problem returns, stop using it and arrange service.
Can I wash a vacuum filter?
Only wash a filter when the manufacturer says it is washable. Use clean water, avoid harsh soap unless approved, and let the filter dry completely before use. Never install a damp filter.
Why does my vacuum smell like burning?
A jammed brush roll or slipping belt can create a rubber smell. An electrical smell, smoke, sparks, or melted plastic requires immediate shutdown and professional inspection.
Can I repair a vacuum power cord myself?
Power-cord repair involves electrical shock and fire risks. Unless you have the required electrical skills and the model supports a proper replacement, use an authorized repair shop or replace the vacuum.
Conclusion: Choose the Safest Repair First
Most vacuum cleaner repair jobs begin with simple checks: empty the bin, clear the hose, clean the filters, and inspect the brush roll and belt. These steps solve many suction and brush problems without touching electrical parts.
Stop and seek professional help for damaged cords, smoke, sparks, electrical odors, repeated overheating, motor faults, or swollen batteries. Start with the model number and owner’s manual, use only compatible parts, and treat safety as part of the repair—not an afterthought.