A coffee grind size ruler is a simple tool that helps match grinds to microns for better brews.
If you want repeatable coffee at home, a coffee grind size ruler is the missing link between guesswork and great taste. I’ve tested rulers like the stainless KRUVE Brewler with many grinders and brew methods. In this guide, I’ll show you how a coffee grind size ruler works, when to use it, and how to dial in faster with fewer wasted shots and brews.

What is a coffee grind size ruler?
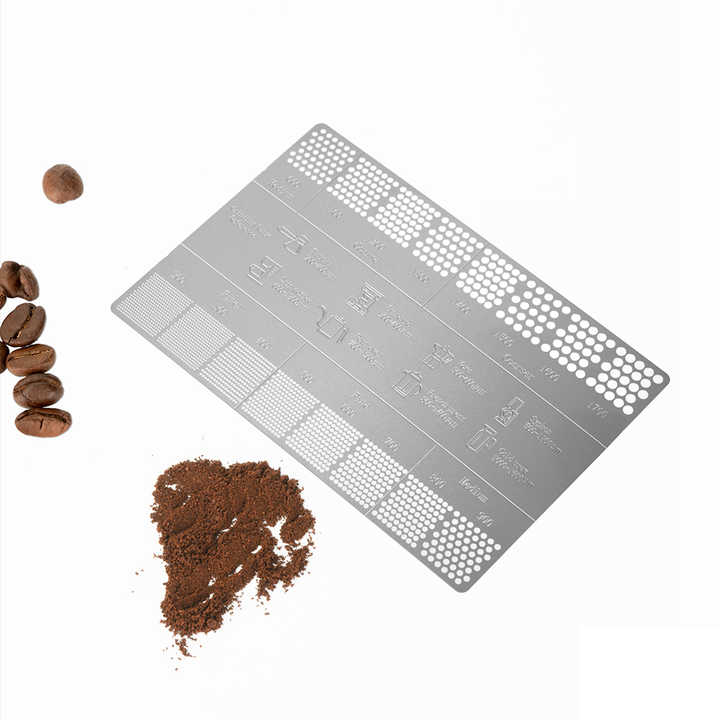
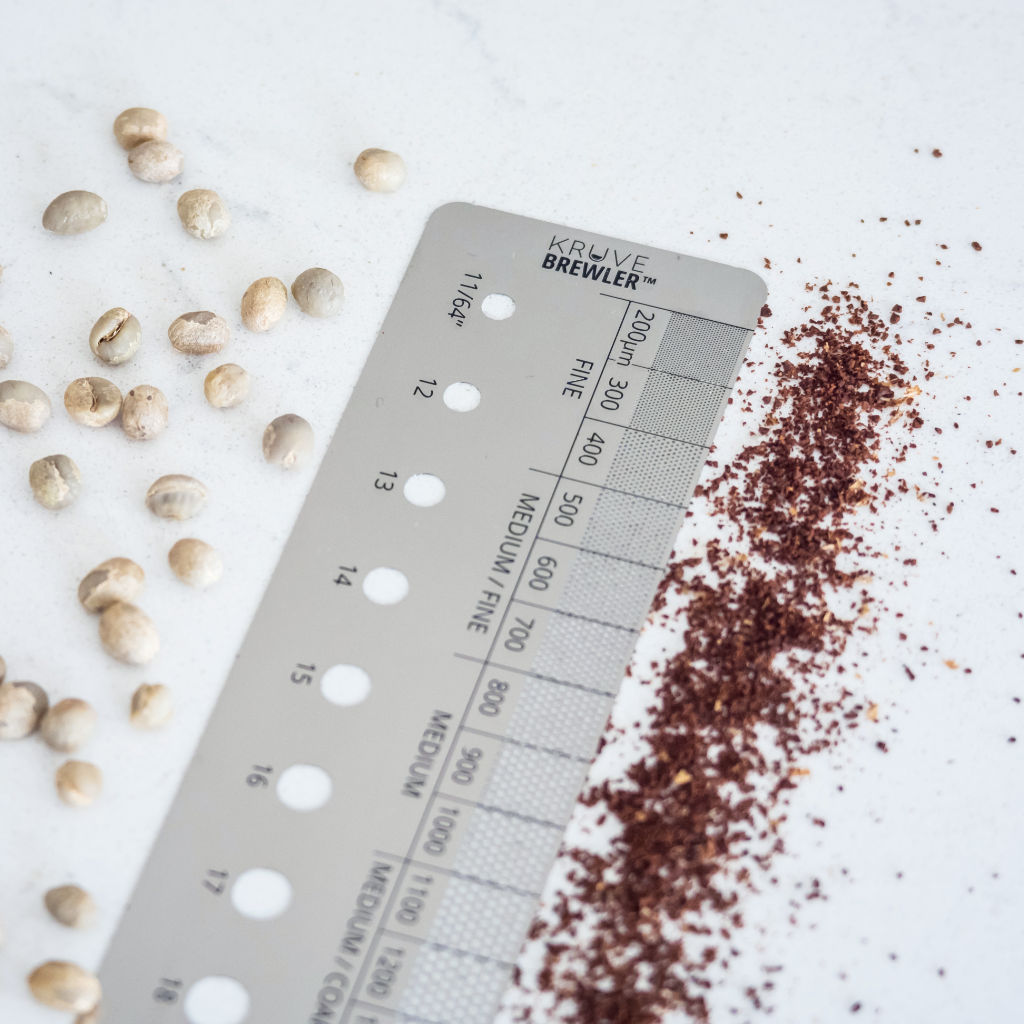
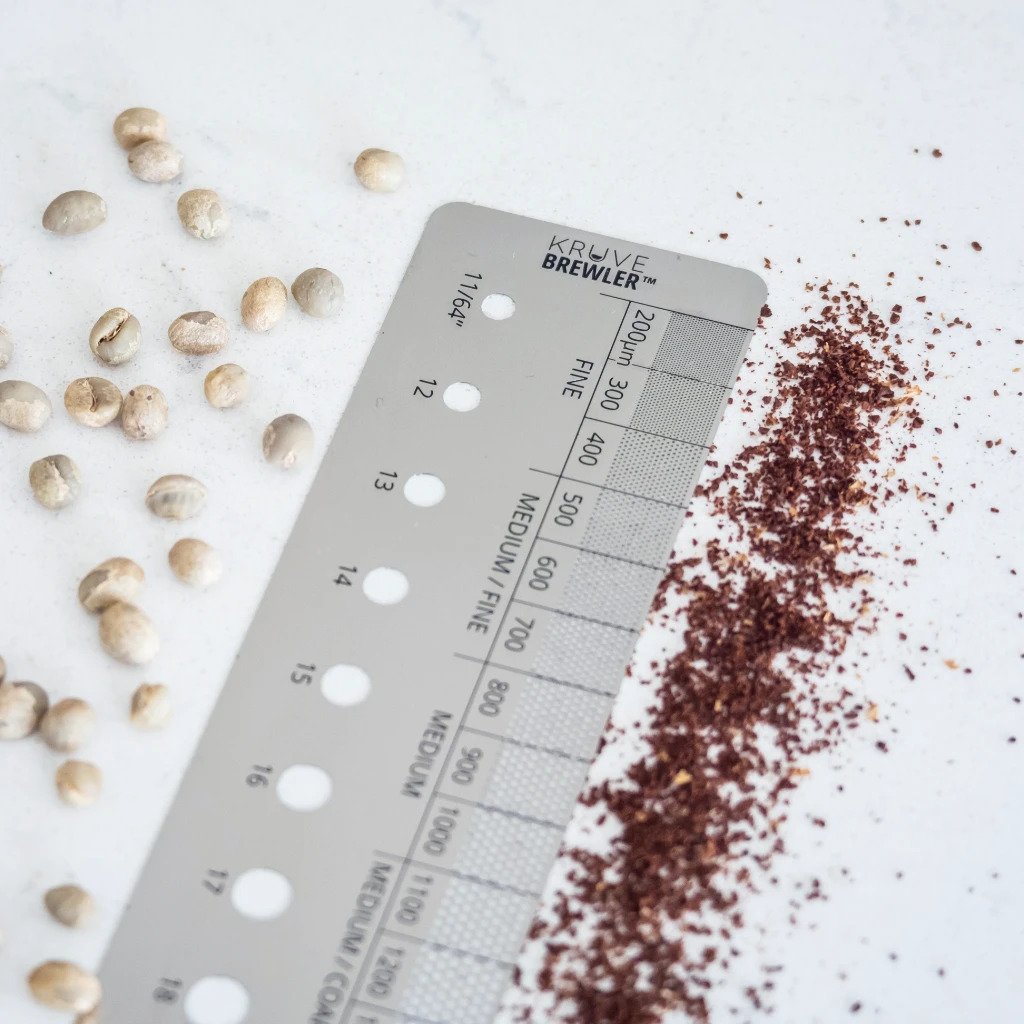
A coffee grind size ruler is a thin, durable card with an etched scale in microns. You spread a few grounds next to the scale and compare particle size by eye. It turns vague terms like fine or medium into real numbers you can track.
Many coffee grind size ruler tools also include quick brew ratios and common ranges for espresso and filter. The most known example is the KRUVE Brewler. It is pocket sized, easy to clean, and very clear to read. With it, you can record that your V60 worked best near 700 microns or your espresso sweet spot was around 250 microns.
A coffee grind size ruler does not replace your senses. It supports them. It helps you log settings, talk in a shared language, and make small, smart changes.

Why grind size matters for flavor
Grind size sets how fast water moves and how much it extracts from the coffee. Small particles have more surface area. They extract fast. Big particles extract slow. The right balance gives clear, sweet cups.
Here are common target ranges to start with. Remember, your grinder and beans may shift these numbers.
- Turkish: 100 to 200 microns
- Espresso: 200 to 350 microns
- Moka pot: 250 to 400 microns
- AeroPress: 300 to 700 microns
- Pour-over (V60, Kalita, Origami): 500 to 900 microns
- Auto drip: 600 to 1000 microns
- French press: 900 to 1200 microns
- Cold brew: 1000 to 1500 microns
A coffee grind size ruler helps you aim at a range, adjust fast, and reduce waste. It also helps you learn how fresh roast dates, water heat, and brew time change with grind.

How to use a coffee grind size ruler step by step
You can use a coffee grind size ruler in two minutes. Here is my simple method.
- Grind a small sample with your normal setting. Use fresh beans.
- Place a few grounds on white paper or a tray. Good light helps.
- Spread the grounds in a thin line next to the micron scale on the ruler.
- Compare the average particle size to the etched marks. Do not fixate on the largest few bits.
- Note the closest micron value and your grinder notch or number.
- Brew, taste, and adjust the grinder finer or coarser by small steps. Re-check the size.
Tip: A phone macro lens or a 10x loupe makes the match even easier. This helps when dialing espresso near 200 to 300 microns.

My testing notes and common mistakes to avoid
I first used a coffee grind size ruler to fix a V60 that tasted thin. My grind looked medium, but the ruler showed I was closer to 450 microns. I moved to about 700 microns, kept my ratio, and the cup popped with peach and cocoa.
Watch for these mistakes.
- Judging by the biggest or smallest few particles. Look at the main cluster.
- Reading in dim light. Use a bright lamp or daylight.
- Comparing oily, dark roasts right after grinding. Wipe the ruler clean between checks.
- Ignoring your grinder’s alignment and burr wear. Bad burrs skew the size mix.
A coffee grind size ruler made my espresso dialing faster too. Instead of chasing shot times alone, I matched grind to about 230 to 260 microns, then fine tuned dose and yield.
Pairing the coffee grind size ruler with other tools
A coffee grind size ruler is strong on its own. It is even better with a few helpers.
- Scale and timer. Lock in dose, yield, and time.
- KRUVE Sifter or lab sieves. Check distribution and remove fines for tests.
- Refractometer. Measure strength and estimate extraction yield if you want data.
- Phone macro lens. Make close-up checks quick and clear.
- Brew log app or notebook. Track micron targets, flavor notes, and water details.
This simple stack keeps your routine lean. It also builds a library of what works with each coffee.

Brew method quick microns guide using a coffee grind size ruler
Use these starting points with a coffee grind size ruler. Adjust by taste and flow.
- Espresso: 200 to 300 microns. Sour and fast shots mean go finer. Bitter and choked shots mean go coarser.
- Moka pot: 250 to 350 microns. Aim for steady sputter, not violent gushing.
- AeroPress: 350 to 600 microns. Short brews favor fine. Long steeps favor coarse.
- Pour-over: 600 to 800 microns. Slow drips and harsh aftertaste need a coarser grind. Fast pours and sour notes need a finer grind.
- French press: 900 to 1200 microns. If the cup is silty, go coarser or skim fines.
Log the micron value with your recipe. The next bag of beans will be easy to dial in.
Troubleshooting with a coffee grind size ruler
When things taste off, a coffee grind size ruler helps you act with purpose.
- Sour or sharp. Check if grounds match your target. If not, go finer by 50 to 100 microns and re-test.
- Bitter or hollow. Check for too fine a grind. Go coarser by 50 to 100 microns and re-test.
- Espresso channeling. If size is right but shots spray, check puck prep, distribution, and tamp.
- Slow pour-over. If grind is correct, try hotter water, reduce dose, or stir less.
- Weak cold brew. Coarseness may be fine. Increase steep time, ratio, or both.
A coffee grind size ruler also helps rule out red herrings. If the grind is on target, look next at water, dose, or temperature.

Limitations and when a ruler is not enough
A coffee grind size ruler reads apparent size. It does not show full particle spread. Different burrs can make more fines at the same average micron size. That changes taste.
Lighting, bean color, and oil can trick the eye. Dark roasts look smaller. Mixed roast levels can skew the read. A coffee grind size ruler gets you close, but a sieve set shows the full picture.
You still need to taste. Data is a guide, not a goal. If your target says 700 microns but the cup is dull, adjust until the coffee sings.
Maintenance, calibration, and safety
Keep your coffee grind size ruler clean and scratch free. Wipe it with a soft cloth. Do not use harsh pads. Store it in a sleeve.
Calibrate your eye once in a while. Use a KRUVE Sifter set to bracket a target, then confirm with the ruler. This anchors your visual checks.
Maintain your grinder. Brush the burrs. Clear retention. Check alignment if shots vary with no change in size. A healthy grinder makes a coffee grind size ruler far more useful.
Frequently Asked Questions of coffee grind size ruler
What is a coffee grind size ruler used for?
It helps you compare your grounds to a micron scale so you can set your grinder with more precision. This leads to faster dialing and more repeatable flavor.
How accurate is a coffee grind size ruler?
It is a visual guide, not a lab tool. Expect close, repeatable readings that are good enough for home and many café tasks.
Is the KRUVE Brewler the same as a coffee grind size ruler?
Yes. The KRUVE Brewler is a branded coffee grind size ruler made from stainless steel with etched micron marks and brew tips.
Can I use a coffee grind size ruler for espresso?
Yes. It is very helpful for espresso, where small micron changes make big taste shifts. Aim near 200 to 300 microns and adjust by taste and flow.
Do different beans need different grind sizes even with a ruler?
They do. Roast level, bean density, and process all change how water extracts. Use the ruler to find a starting size, then fine tune.
Will a coffee grind size ruler replace a sifter or refractometer?
No. It complements them. The ruler gives quick size checks, while sifters show distribution and refractometers measure strength.
How often should I check grind size with the ruler?
Check when changing beans, brew method, or grinder settings. A quick check saves time and avoids wasted brews.
Can I trust the same micron target across different grinders?
Use it as a guide, not a rule. Burr design changes how particles extract even at the same micron size, so always taste and adjust.
Conclusion
A coffee grind size ruler turns guesswork into a clear plan. It links your grinder setting to real micron targets, so your brews improve fast and stay consistent. Use it with a scale, a timer, and your taste, and you will waste less and enjoy more.
Pick one method to dial in this week. Log the micron size that tastes best. If you found this guide helpful, share it with a coffee friend, subscribe for more brew tips, or leave a question so we can troubleshoot together.